I surf around on reddit from time to time, and I found an interesting article on a Wifi deauthenticator. After reading it I figured this was something I wanted to have in my arsenal, so here’s how I made it.
The cornerstone of this device is the ESP8266 WiFi development board. I ordered mine here: https://www.banggood.com/Geekcreit-Doit-NodeMcu-Lua-ESP8266-ESP-12E-WIFI-Development-Board-p-985891.html?rmmds=search&cur_warehouse=CN
Next thing was to get a firmware flasher, like this one: https://github.com/nodemcu/nodemcu-flasher
It has a quick guide on the readme of the repo, but just go to win32 or win64 release folder and download the .exe unless you want to do any changes. (alternative for linux, mac and windows: https://github.com/espressif/esptool)
Then you want the deauthenticator firmware from here: https://github.com/spacehuhn/esp8266_deauther/releases
I would suggest getting the esp8266_deauther_1mb.bin for the NodeMCU, works like a charm.
Ok, let’s put the pieces together! Connect the board to your computer by usb, fire up your firmwareflasher and select the firmware you want to flash.
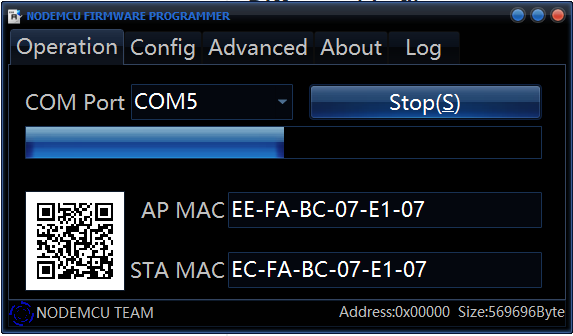
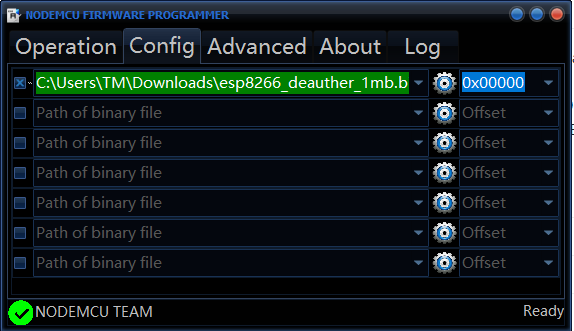
You need to select the right COM port, then go to Config-tab to select file to flash, then back to Operation to start flashing. When you’re done you simply unplug and plug the usb again, and the board will boot with the deauthenticator firmware. Cool!
Next step is connecting to the newly discovered WiFi ssid: “pwned”, with the password “deauther”. Once connected, go to 192.168.4.1 to open the portal.
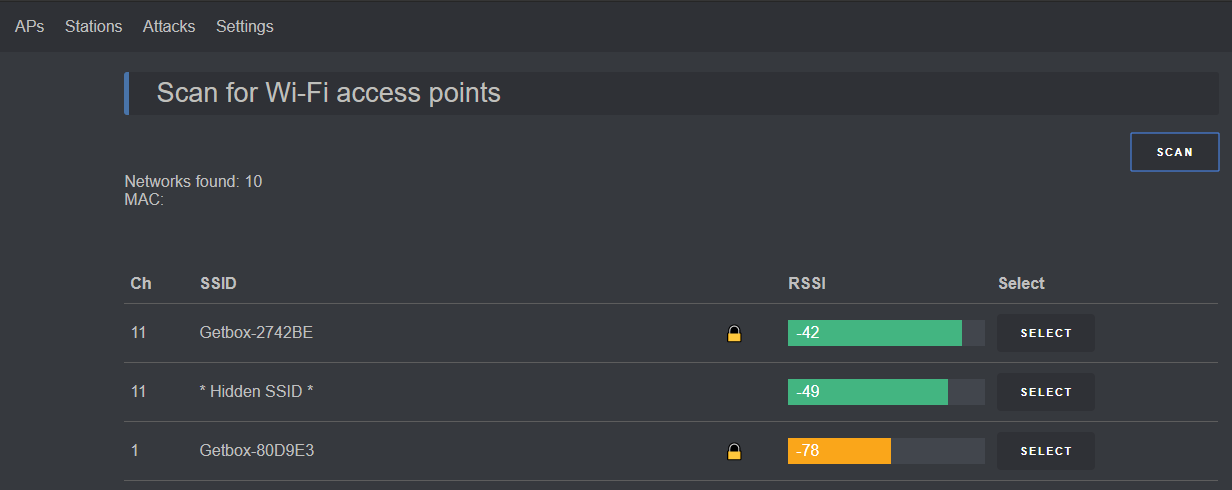
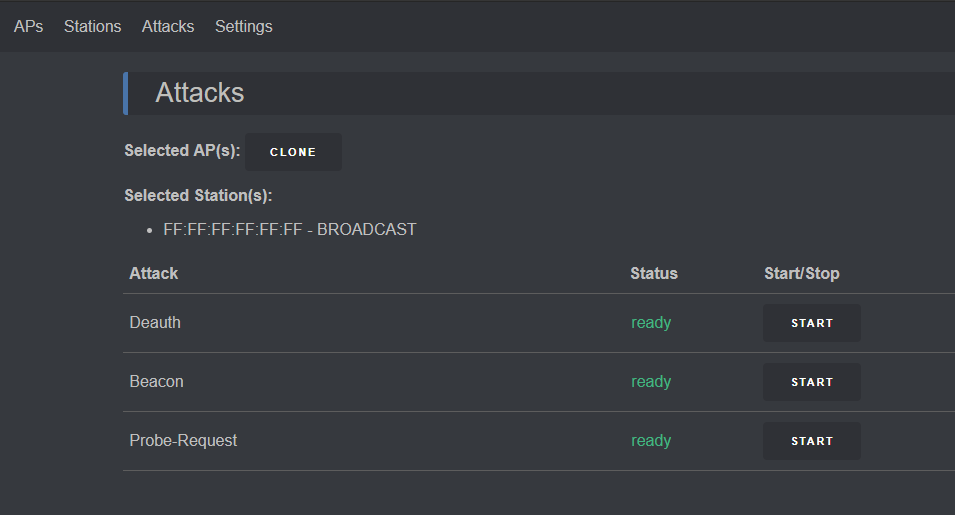
It will discover the available AP’s on its own, you simply have to select which ones to deauthenticate or otherwise tamper with, go to Attacks and start the attack of your choice. I will however advice you to go to settings and select the same channel as your target AP when using deauth to avoid getting kicked out of the deauthenticator.
Another thing to keep in mind is that the deauthenticator firmware is programmed to log every attack you execute. You can see this in the Attack.cpp on line 310. Just clone the repo and tamper with the log-function if you want to, but for security analysis/testing/demonstrations there’s no reason to remove the logging.
If you have access to a 3D-printer there’s a nice case for the NodeMCU on thingiverse: https://www.thingiverse.com/thing:1305796
This device is small and has a low power requirement, so it’s easy to imagine how you could power one of these with a small powerbank, set it up and hide it while executing the rest of your evil masterplan! Moahahah!