My Raspberry Pi died again, probably because I’m using the wrong kind of SD-card. My friend Marius (his website) suggested that HD-card class 4 may have issues when running for a long time, like when it is the drive for a Raspberry Pi, and that I should replace it with a class 10 SD-card.
Anyways…
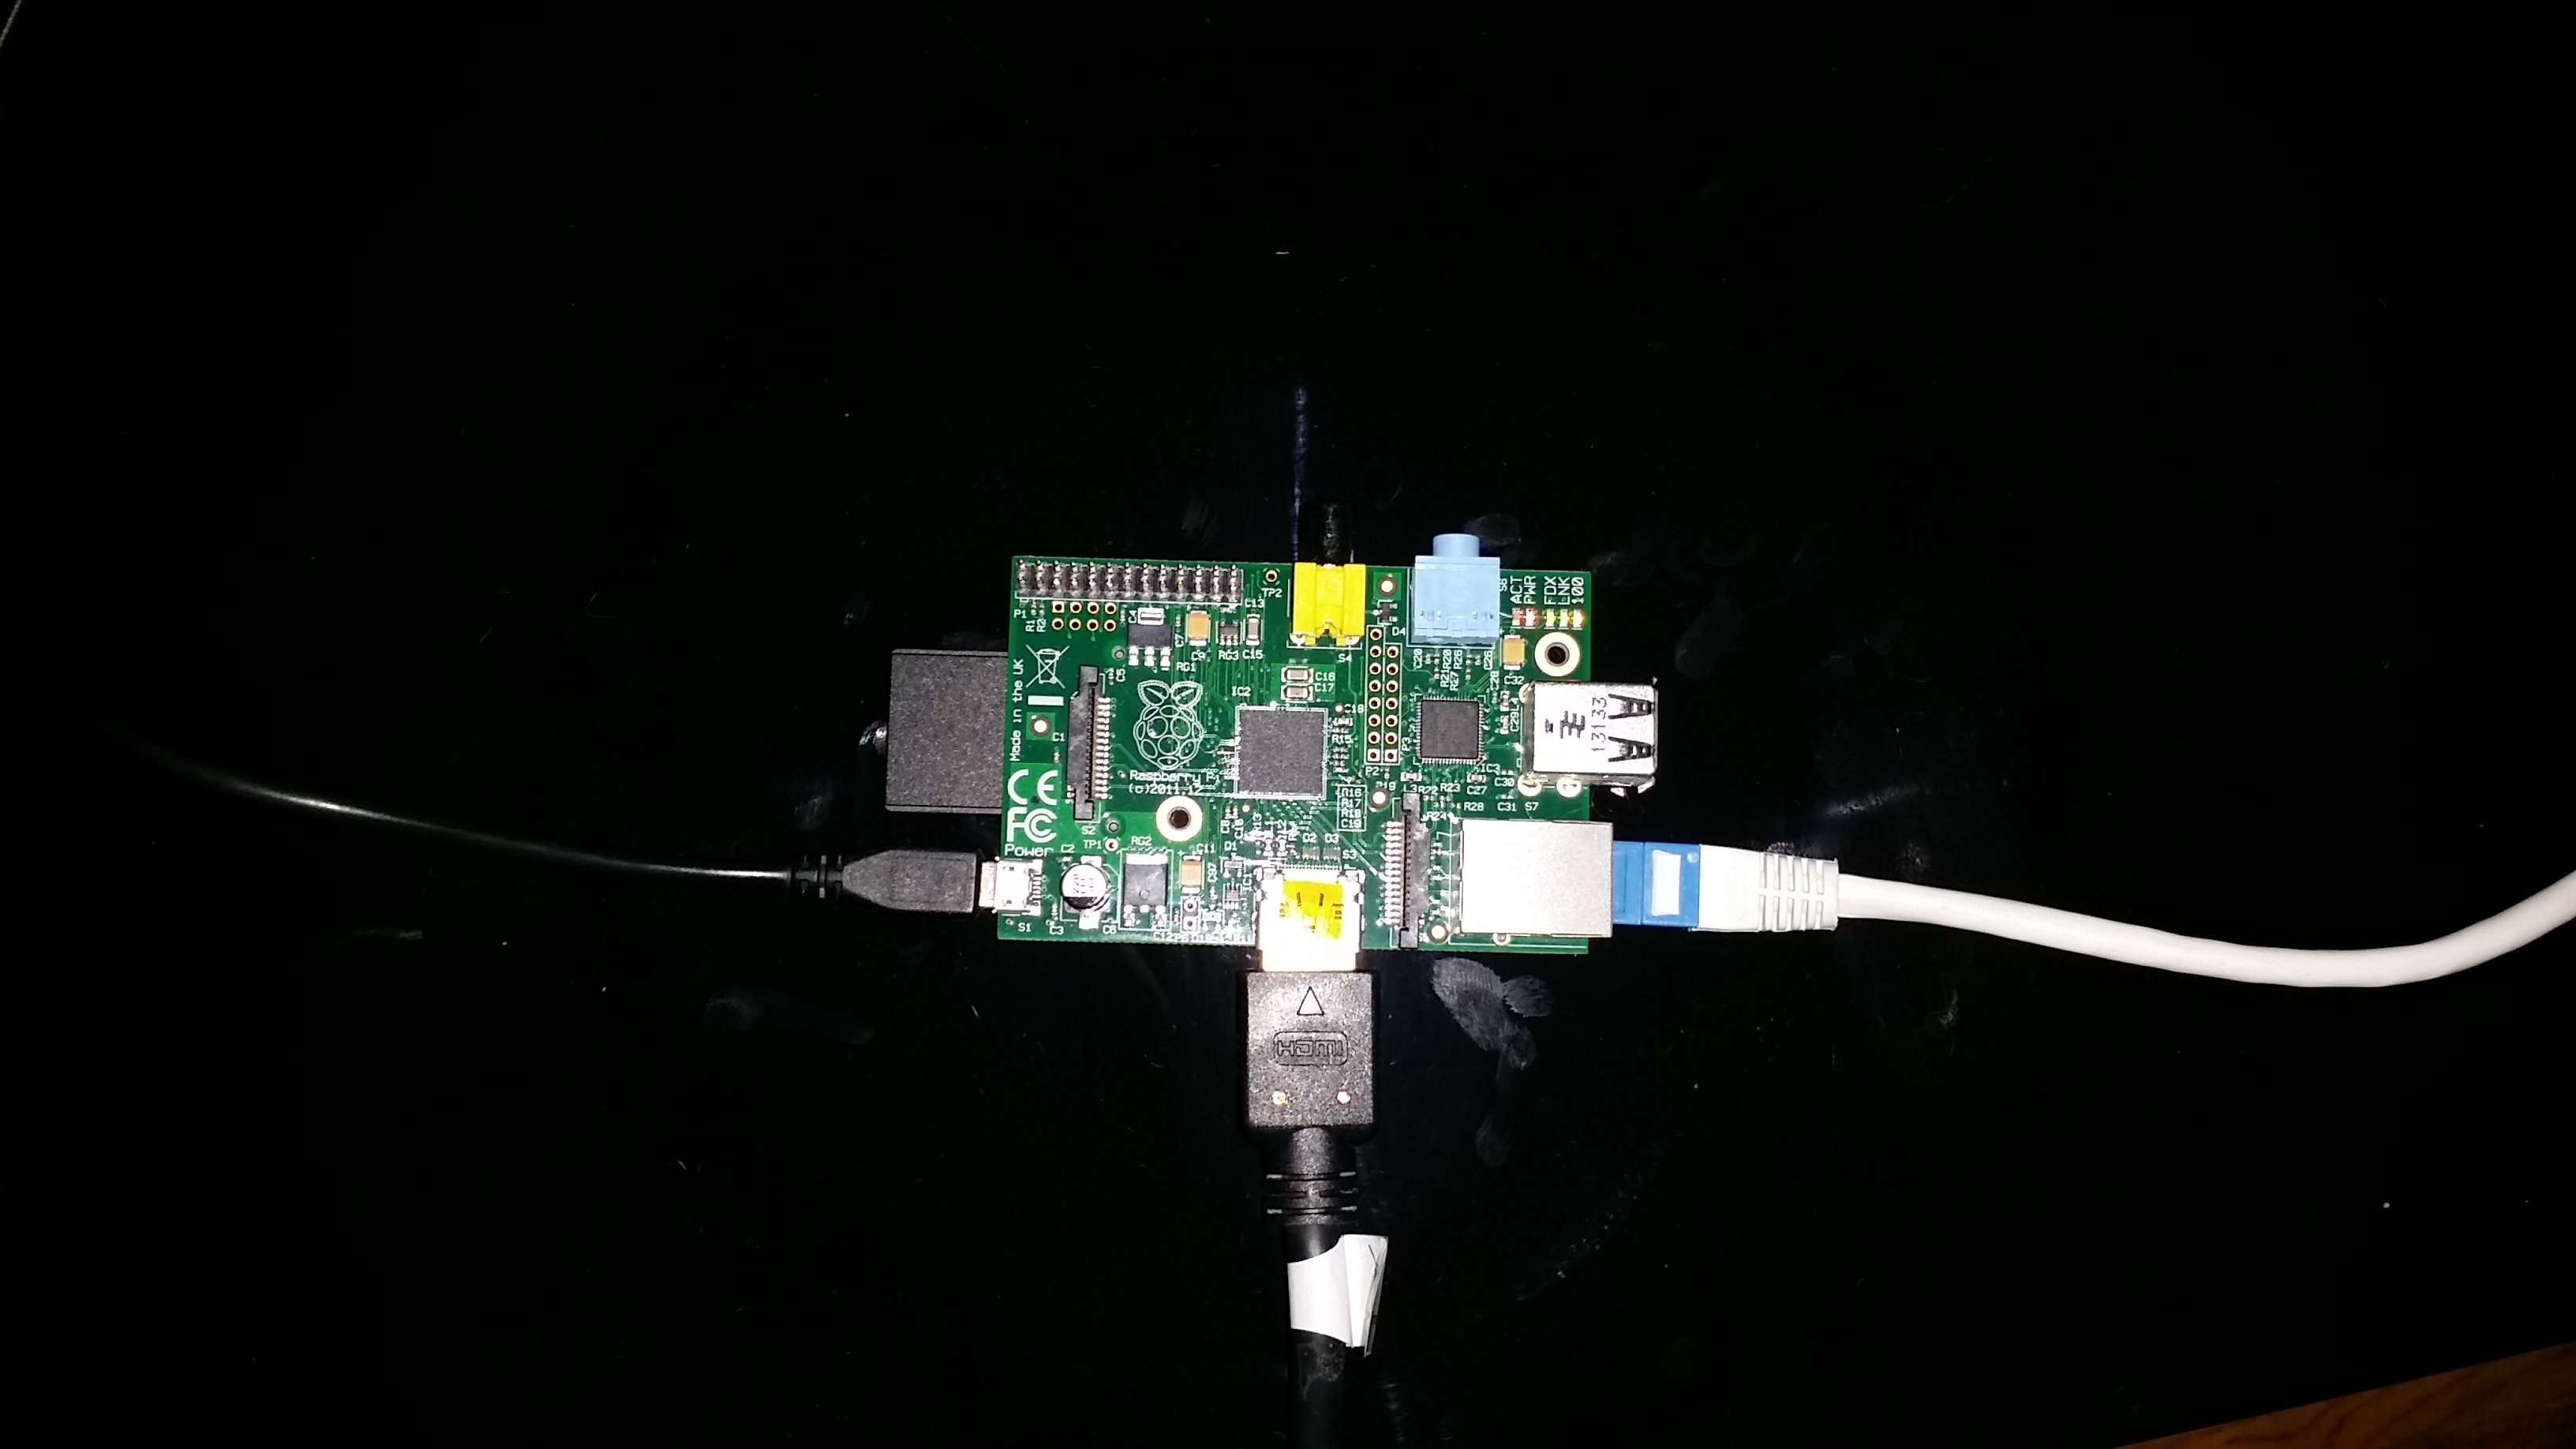
For this project I’m using my old Raspberry Pi Model B.
Start by downloading the image-file from . I’m using the wheezy raspbian .zip file for offline install. I actually have the .zip from before since I’ve done this before and I’m going to use it. Just replace the version number with the correct version for your download for the commands that are about to follow.
Open a terminal with Ctrl+alt+T (if you’re using Unity on Ubuntu). Navigate to the folder containing the recently downloaded .zip file.
Unzip with: unzip ~/2014-09-09-wheezy-raspbian.zip
You should now have a file named 2014-09-09-wheezy-raspbian.img or similar if your downloaded file is older or more recent than mine.
Now, check which devices are currently mounted using: df -h
If you run this first without your SD-card in the slot, and then with the SD-card in the slot, you should be able to figure out which device is the recently mounted SD-card. For me it’s /dev/sdb1. The number in the end of the SD-card path tells which partition is mounted on the SD-card, but in this case we want to write to the whole SD-card.
To do that we first need to unmount the card with umount /dev/sdb1. If you run the df -h again you won’t see the SD-card (at least you should not).
Now to the part where we actually write stuff to the SD-card!
We will use dd bs=4M if=2014-09-09-wheezy-raspbian.img | pv | dd of=/dev/sdb
bs stands for blocksize. It should work with 4M as blocksize, but if it doesn’t you should try reducing the blocksize to 1M. It will take longer time writing the imagefile to the SD-card, but if it works it’s worth it. Remember to use sudo if you get ‘permission denied’.
When it’s done you plug your SD-card into the Raspberry Pi, power it on and connect it to your network.
I’m not going to use a monitor to verify that it is running. Instead, I will attempt to access it with ssh. To do that I need to know what its IP is. I will use the same logic as I did with the mounted drives.
for this part I assume you are on a network that doesn’t prohibit portscanning and that you have NMAP installed. If not, you can install it with:
sudo apt-get install nmap
First, we need to figure out which subnet we’re on by using:
ifconfig
This command will list information about all network interfaces. For me, as I’m currently using wireless for my internet connection, I’m interested in the wlan0 interface. One of the parameters is called inet addr: 192.168.2.11 and this tells me I’m on a local network (192.168.x.x), on subnet 2 (x.x.2.x), and that my laptop has been assigned the id 11 (x.x.x.11) on this network. That means that when I connect my Raspberry Pi to my router with a cable it will get an adress on the same network (192.168.2.x), but I don’t know what the last part of the IP will be.
I will find this out by listing all active hosts on this network using nmap:
nmap 192.168.2.1/24
This revealed that 5 hosts: 1 (my router), 2, 3, 5 and 11 is currently up and active on my network. Now I connect my Raspberry Pi to the router and power and run the command again.
It doesn’t show up… Allright, now we need to find out why. I start by plugging my HDMI-cable into the Raspberry Pi and my tv and select the right channel. Next, I unplug the Raspberry and plug it back in again to reboot it. The data on the SD-card is corrupt…
I plug the SD-card back into my computer, use df -h to find it and then sudo mkfs /dev/sdb1 to format it. Make sure you format the right device, just saying…
I don’t know why, but it seems that the command I used to write the imagefile to the SD-card didn’t work as intended. When I used sudo dd bs=1M if=wheezy.img of=/dev/sdb instead it worked.
Booting the Raspberry with the freshly rewritten SD-card works fine, and by using nmap again I find my Raspberry’s IP.
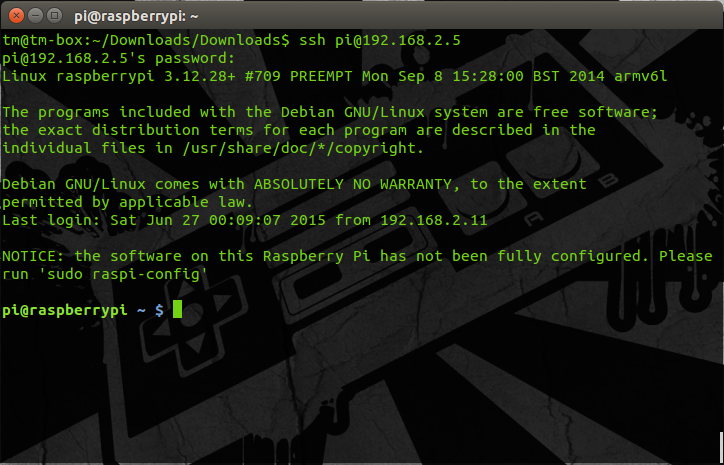
Since the Raspberry is running stock software the ssh login credentials is
ssh pi@192.168.2.4

password: raspberry
I get a connection and I’m now able to control the Raspberry from my laptop!
I hope this post may help you when trying to make your Raspberry boot from SD-card, but if you want more in depth explanations and alternate ways to accomplish this you should check out this guide. Let me know what you think in the comment section below!
